A driveway can look finished on the surface and still fail underneath. In Florida, that usually shows up fast – shifting pavers, standing water, edge movement, or low spots where vehicles sit every day. The driveway paver installation process matters because the real strength of the project comes from what happens before the first paver is ever set.
For homeowners across Tampa Bay, a new paver driveway is usually about more than appearance. Yes, it adds curb appeal and gives the front of the home a cleaner, more custom look. But it also needs to handle heavy use, summer heat, hard rain, and the kind of drainage demands that come with Florida conditions. That is why a quality installation follows a clear process, not shortcuts.
Why the driveway paver installation process matters
A lot of people focus on color, shape, and pattern first, which makes sense. Design is the visible part of the investment. But if the excavation is shallow, the grading is off, or the base is not compacted correctly, even premium pavers can underperform.
A well-built driveway has to do several jobs at once. It needs to carry vehicle weight, shed water away from the home, resist movement over time, and still look clean and consistent from edge to edge. That balance between appearance and structural performance is what separates a surface that lasts from one that starts showing problems in the first year.
Step 1: Site evaluation and layout planning
Every successful project starts with a close look at the property. The crew measures the driveway area, checks access, studies slopes, and identifies drainage patterns. This is also when details like border style, laying pattern, transition points, and final elevation are worked out.
In Tampa Bay neighborhoods, no two driveways behave exactly the same. Some homes have drainage concerns near the garage. Others need better runoff control near landscaping or sidewalks. A flat-looking yard can still have subtle grade issues that affect how water moves. Planning at this stage prevents expensive corrections later.
This is also where homeowner goals get aligned with practical performance. A wider driveway may improve daily use, but it has to fit the lot and support proper edge restraint. A lighter paver color may stay cooler, but the finish still needs to fit the home’s style. Good planning accounts for both.
Step 2: Excavation to the right depth
Excavation is where the project starts becoming structural. The existing surface and unsuitable material are removed to create room for the base, bedding layer, and pavers. Depth matters here. A driveway needs more support than a walkway because it carries repeated vehicle loads.
This is one of the biggest differences between a professional installation and a quick cosmetic job. If the excavation is too shallow, the base ends up too thin. That can lead to rutting, settling, or movement over time, especially where tires regularly pass.
The exact depth depends on site conditions, soil behavior, and the intended use of the driveway. In some areas, the underlying soil is stable enough to support a straightforward build. In others, extra attention is needed because soft spots or moisture issues can compromise the finished surface.
Step 3: Grading and drainage preparation
Before the base is built up, the subgrade has to be shaped correctly. This part of the driveway paver installation process is easy to overlook, but it has a direct effect on long-term performance. Water should move away from structures and not collect in low areas.
In Florida, drainage is never a side issue. Sudden storms can expose weak grading very quickly. Even a beautiful driveway will become frustrating if water pools near the garage or stays trapped between joints and edges. Proper grading creates the foundation for a surface that drains as it should.
Sometimes this step is simple, and sometimes it requires more detailed correction. The right approach depends on the slope of the property, nearby hardscape, and where runoff already wants to go. That is why experienced installers do not treat every driveway the same.
Step 4: Base installation and compaction
The base is the load-bearing system of the driveway. After excavation and grading, layers of aggregate base material are installed and compacted. Compaction is not a one-time pass. It is done in controlled lifts so the base becomes dense, stable, and consistent throughout the area.
This stage is where durability is built. If the base has soft sections or uneven density, those weak points often show up later as settlement or shifting. A driveway might look perfect at completion and still develop issues if compaction was rushed.
For residential driveways, precision matters. The base needs to be thick enough for the use, compacted correctly, and shaped to the planned slope. Done right, it supports both the pavers and the daily weight of cars without unnecessary movement.
Step 5: Edge restraints and bedding sand
Once the base is complete, edge restraints are installed to help hold the paver field in place. This is especially important on driveways, where turning tires and repeated traffic put pressure on the edges. Without proper restraint, pavers can gradually spread or shift outward.
After that, a bedding layer of sand is screeded over the compacted base. This layer is not meant to hide an uneven base or make major corrections. Its purpose is to create a smooth, accurate setting bed for the pavers. If too much is used, it can weaken the system. If it is inconsistent, the finished surface can vary in height.
This is one of those stages that looks simple from a distance but takes care and experience to do right.
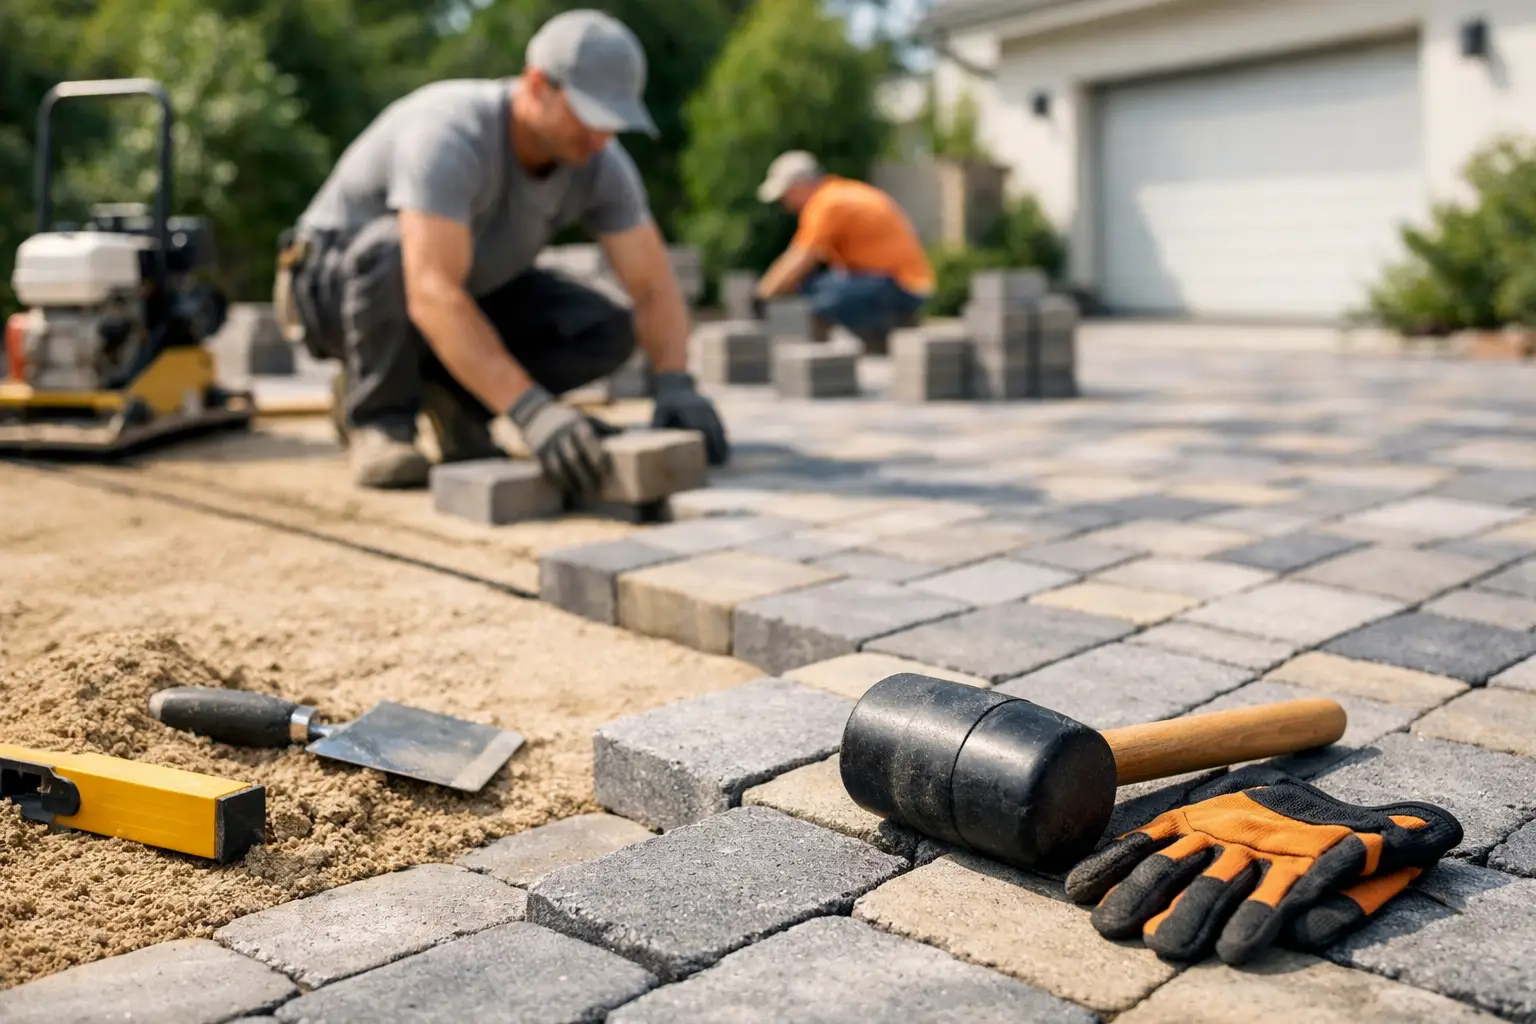
Step 6: Laying the pavers with precision
Now the visible part of the project comes together. The pavers are laid in the selected pattern, with close attention to alignment, spacing, and blend. At this stage, craftsmanship shows. Straight lines, clean borders, and consistent joints make a big difference in the finished appearance.
Pattern choice affects more than style. Some patterns can perform better for driveways because they help distribute vehicle loads more effectively. The right selection depends on the paver shape, the layout of the driveway, and the look the homeowner wants.
Cutting is also part of this step. Around borders, curves, and transition areas, pavers need to fit cleanly. Sloppy cuts can make even high-end materials look unfinished. Precision here gives the driveway a polished, built-to-last appearance.
Step 7: Joint sand, final compaction, and surface lockup
After the pavers are placed, joint sand is worked into the spaces between them. The surface is then compacted so the pavers settle into the bedding layer and the system tightens up. More sand is added as needed to fill the joints fully.
This step helps create interlock, which is a big part of how a paver driveway performs under traffic. Individual units are strong, but the system works because the pavers, sand, edge restraints, and base all support each other.
Depending on the project, polymeric sand may be used, or a traditional joint sand approach may make more sense. The right choice depends on the paver type, site conditions, and maintenance expectations. There is no one-size-fits-all answer, which is why product selection should match the actual driveway conditions.
Step 8: Cleanup, inspection, and homeowner walkthrough
A professional project should not end with leftover debris and unanswered questions. Final cleanup matters. So does a full inspection of the surface, edges, drainage flow, and finish details.
The homeowner should understand what was installed, how the driveway will settle into normal use, and what kind of maintenance helps protect the investment. Pavers are low maintenance compared with many surfaces, but low maintenance does not mean no maintenance. Occasional joint sand touch-up, surface cleaning, and attention to drainage keep the driveway looking and performing its best.
For homeowners who want both curb appeal and long-term reliability, this final walkthrough is part of the service. It gives confidence that the work was done correctly and the property was left clean.
What homeowners in Tampa Bay should expect
In this region, climate has to be part of the installation strategy. Heat, humidity, heavy rainfall, and shifting moisture conditions all affect how outdoor surfaces perform. A driveway built for another part of the country may not be built the right way for homes in Tampa, Brandon, Clearwater, Riverview, or St. Petersburg.
That is why local experience matters. The process should account for drainage, subgrade conditions, and the practical realities of Florida weather. At Top Pavers, that focus on preparation and execution is what turns a driveway into a long-term upgrade instead of a short-term improvement.
A well-installed paver driveway should feel solid underfoot, drain properly in storms, and hold its lines over time. It should also fit the home visually, not look like an afterthought. When the process is handled correctly from excavation to final compaction, the result is more than a surface upgrade. It is a stronger first impression every time you pull into the driveway.